Trustworthy Sourdough Bread
Sourdough bread requires patience, yet little effort or active time. Learn to enjoy the bread-making process while making wholesome healthy bread for you and your family.
Servings: 2 loaves
Ingredients
Sponge
- 250 g sourdough starter
- 800 g water (spring or filtered preferably)
- 350 g unbleached wheat flour (bread flour)(see notes)
- 155 g high extraction wheat flour (brown flour)(see notes)
Bulk Fermentation
- 425 g unbleached wheat flour (bread flour)(see notes)
- 145 g high extraction wheat flour (brown flour)(see notes)
- 24 g salt
Instructions
Sponge
- Pour the sourdough starter into a large bowl. Add the water and then the amount of flour indicated for the sponge step. Mix together gently with a wooden spoon.
- Cover the bowl with a cheese cloth or a dish towel. Leave the covered bowl in a place sheltered from drafts for several hours. I usually prepare the sponge before going to sleep and leave it overnight. The temperature where the bowl sits should not be too hot or too cold.
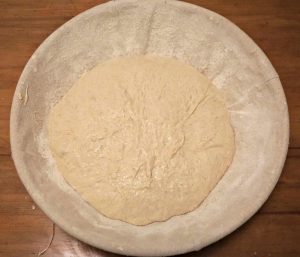
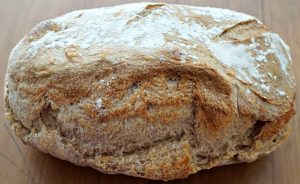
- After the long rest, you will have a sponge (a frothy mix, with bubbles on top). The bubbles show the sourdough starter is active.
Bulk Fermentation
- Add the amount of flour and salt indicated for the bulk fermentation stage into the glass bowl with the sponge. Mix together with a wooden spoon. Let it sit a few minutes.
- Stretch and Fold: Starting on one side of the bowl, lift the dough up and fold it over the dough towards the other side of the bowl. Turn the bowl counter-clockwise one-forth and repeat the stretch and fold. Keep turning the bowl as you stretch and fold about 5 to 7 minutes. You will see that the dough becomes less sticky and holds together better.
- NOTE: Many recipes call for you to turn the dough out onto a floured board for the stretch and fold phase. I leave the dough in the bowl and use a dough scraper to lift the dough up and fold it over to the other side.
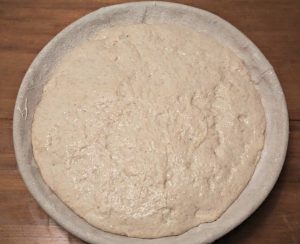
- Stretch and fold the dough 2 more times, with at least 30 minutes between intervals. You will see after the first interval that the dough has risen a bit. Be more gentle when you stretch and fold the dough the next two times for only a couple minutes.
- After the third interval, cover the bowl with a cheese cloth or dish towel. Let the dough rest in a place sheltered from drafts until it rises 1.5 to 2 times the size. It usually takes 2 to 3 hours beyond the stretch and folding intervals. However, the amount of time needed will depend on the temperature in the room (warmer temperatures will make it rise faster) and on how active your sourdough starter is.
Shaping and Proofing
- During this shaping and proofing phase, I take a few shortcuts that do not hurt the final result at all. Turn the dough out onto a floured board. Be careful that you do not use much flour at this stage. Divide the dough in half to make 2 loaves.
- With a dough scraper gently stretch and fold the dough one time around the clock, giving the dough the shape you like (round or loaf style).
- Lightly flour the banneton or the loaf pan that you will use for the second rise. Add a little cornmeal on the inside of your form to help avoid the dough sticking later. I usually use a banneton for one loaf and an enameled loaf pan for the other. Improvise according to the baking dishes you have available. Turn the dough over. Cup your hands around the dough and turn lightly
- Put some of the dough into each form. You can of course divide the dough into different proportions than half: half.
- Using the dough scraper again, gently bring the dough away from each side towards the other side. Basically you will stretch thin layers of dough from one side to the other, creating tension in the center. This helps form the final shape and prevents the shape changing much during baking.
- Cover the banneton and/or loaf pan with a cheese cloth or dish towel and let it sit about 2 hours for the second rising.
- Put the covered banneton / loaf pan into the refrigerator for a slow fermentation about 8 to 16 hours. I often put it in the refrigerator over night. The slow fermentation will help the sourdough to develop a deeper flavor. Try not to rush the process.
Baking
- Preheat the oven to 500°F / 260°C. If you are using a pizza stone or other pan for baking, place the stone or pan in the oven to preheat as well. It's important that you put the dough directly onto something that has the temperature of the oven.
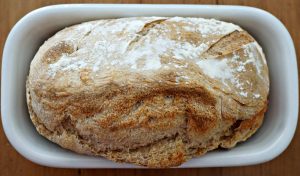
- Take the dough out of the refrigerator. For my dough in the banneton, I turn it gently over onto baking paper. It might deflate a little, but do not worry it will rise again in the oven. For my dough in the loaf pan, I leave it in the pan for baking. If you use a ceramic or stoneware loaf pan, be sure to remove it from the oven 30 to 60 minutes before putting it in the oven to avoid breakage.
- Use a sharp knife or a lame to cut thin lines on the top of the dough. Try to make the cuts at a 45° angle. These cuts will help the steam to escape the dough when the bread rises in the oven.
- Spray some water into the oven immediately before placing the bread in the oven. The humidity will help the crust be less dry and more chewy.
- Place the bread in the middle of the oven. For my loaf on the baking paper, I use a pizza peel to gently place my dough onto a hot pizza stone. Turn down the oven to 450°F / 230°C. Keep the oven door closed at least during the first 15 minutes while the bread rises for the last time.
- Continue baking between 45 to 60 minutes, depending on the oven and dough. You can open the oven after the initial 15 minutes to spray more water on the walls of the oven (not on the bread). When the bread is ready, the top will be a golden brown and the edges will start moving away from the side of the baking pan (if you use one). If the bread is not in a pan, tap it on its bottom. If you hear a hollow sound, it is baked.
- Remove the bread from the oven and place it on a cooling rack for about an hour. If the bread does not easily fall out of the bread pan immediately out of the oven, wait about 10 to 15 minutes before gently removing the bread from the loaf pan using a sharp knife around the edges to prod the bread out of the pan. Leaving the bread in the pan too long may cause steam to make the bread a little wet on the sides and bottom. If this happens, place the bread back in the oven about 10 minutes to dry off.
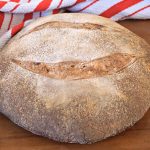
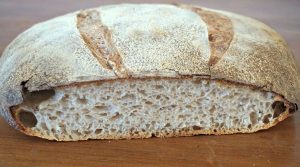
- Slice the bread and enjoy!
Notes
Read the notes in the article above to learn about the different types of flour and extraction rates.