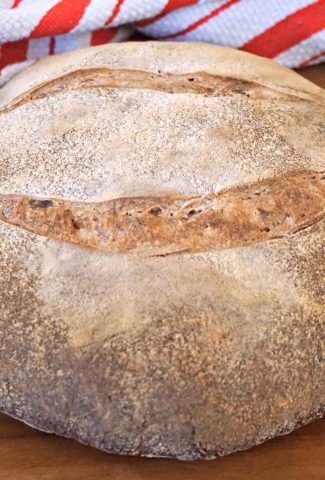
Sourdough Bread is My Favorite Type of Bread
Over the past twenty years I’ve made dozens of loaves of bread. Quick breads, yeast breads and sourdough breads. Not all breads have turned out perfectly. Yet, the process of making bread is always enjoyable.
As the name suggests, quick breads do not require time to rise. Generally you add baking soda or baking powder to the recipe so your baked goods will rise in the oven. Sometimes you need to add an acidic agent, such as buttermilk or yogurt, to help the baking soda work properly.
Yeast breads use either dry yeast or cake yeast to encourage the dough to rise. When using yeast, the rising time will not be very long. Usually one or two hours for each rise. Even less time for each rise if you use instant dry yeast.
My favorite type of bread, however, is sourdough bread made from a sourdough starter. Learn how to create, maintain and use sourdough starter with A Basic Sourdough Starter Guide. Sourdough bread requires more care and patience, yet does not take more active time than quick or yeast breads. Like for yeast breads, sourdough bread requires you to mix and knead the dough before letting it rise once or twice. The dough nevertheless needs more time to ferment. During this fermentation time the sourdough starter will turn the flour and water into a mouth-watering delight. You can meanwhile go about your other business.
See A Guide For Making Bread at Home for a useful description of the bread-making process. This guide will lead you through the various steps of making bread as well as familiarize you with some of the vocabulary used. It will definitely supplement the information you will find in this post.
Finding a Trustworthy Sourdough Bread Recipe
The past few months I’ve tried several recipes for sourdough bread. For example, I followed a couple recipes from Nancy Silverton’s legendary book Breads from the La Brea Bakery as well as another recipe from Moro: The Cookbook by Sam and Sam Clark.
Through these experiences, I have developed this trustworthy fail-proof recipe for you. It skips some of the steps mentioned in other recipes for shaping and proofing. Yet, you will not notice the difference and will be pleased to save the effort.
Ingredients of Sourdough Bread
This Sourdough Bread recipe calls for 75% organic hard unbleached wheat flour (aka bread flour) and 25% organic high extraction wheat flour (aka brown flour), along with the sourdough starter, water and salt. That’s it! No fat or sugar added. Five main ingredients for a bread whose flavor is the right amount of tangy, especially when toasted. This bread is also fairly light and airy while having a medium density.
Definition of flours
Do not be intimidated by the name for the flours used. Hard unbleached wheat flour is made from hard red winter wheat, which is great for bread recipes as it’s higher in gluten. It is basically a bread flour that has not been bleached white. Bread flour, like other white flours, are usually made from whole wheat grain, yet have been processed to remove the bran and wheat germ. Whole wheat flour is also made from the whole wheat grain, but keeps the bran and wheat germ. As a result, whole wheat flour is higher in fiber, thus more nutritious and heavy than white flour.
Between whole wheat flour (which contains all the bran and germ) and white flour (which has sifted out the bran and germ) lie several types of brown flour. Each type indicates the level of ash that remains in the flour after being processed. The ash in flour comes mainly from the bran, with some coming from the germ or even the endosperm. Whereas Type 50 flour (white flour) contains about 0.5 % ash, Type 150 (whole wheat flour) contains between 1.5% and 2% ash. The number given to each type expresses the level of ash remaining in the flour.
The term high extraction refers to a higher level of ash remaining in the flour after being processed. I’ve been using Type 85 flour, which is considered to be high extraction flour lying somewhere between white and whole wheat flour (Type 150). It retains much of the nutritional value of whole wheat flour, yet contains less bran. Consequently, products made with Type 85 flour will be lighter than products made with Type 150.
Buying Bread Flour
Most supermarkets carry bread flour in their baking goods section. Popular brands, such as King Arthur Flour and Bob’s Red Mills sell bread flour at stores across the United States as well as via their websites. I love Central Milling‘s Organic Artisan Bakers Craft Plus, which is malted hard unbleached wheat flour. The slight addition of malted barley enhances the taste of my homemade sourdough bread and helps the dough rise even better. Central Milling offers a wide selection of flours and grains via their online store and at specialty stores nationwide. I’ve purchased the flour directly from Central Milling as well as at my favorite neighborhood butcher shop, McCalls Meat and Fish Company. The price ends up being the same.
Substituting flour made from other grains
The higher the extraction your flour is, the more dense your bread will be because of the extra fiber from the bran and wheat germ. However, substituting some oat or spelt flour for up to one-fourth of the bread flour (hard unbleached wheat flour) will give the sourdough bread a different texture. Oat and spelt flours, for instance, tend to make the bread more soft and tender while giving it nutty overtones.
Likewise, substituting some of the Type 85 flour with flour milled from other grains, such as rye flour or buckwheat flour, will influence your bread’s taste. Personally I enjoy substituting about one-fourth of the Type 85 flour with rye and/or buckwheat flour to give my bread a flavor that has more depth.
While buckwheat and oat flours are gluten free, spelt and rye flours contain some gluten, yet less than in wheat flour. As flours containing no or little gluten reduce the rise and elasticity of your bread, I recommend substituting only up to one-fourth of the total wheat flour indicated in the recipe with flour made from other grains.
Use this recipe as a starting point to practice your bread-making skills. Later, maintain the same general proportions when substituting in other flours to try new combinations. You might need a little more or less flour than indicated in the recipe, depending on the humidity in the room and in the flour. After making bread a couple times, you’ll develop an instinct to know how hydrated you want your dough.
Time and Patience will Improve Your Sourdough Bread
Waiting patiently during the entire bread-making process will probably be your hardest task. This recipe requires between 24 and 36 hours from start to finish. However, you will only need to work about 30 to 40 minutes of this time to produce a full-flavored and super tasty sourdough bread. You might want to skip steps or shorten the time needed for fermentation or a rise, but please resist.
The longer the dough ferments, the more complex and sour your bread’s flavor will be. Be careful though not to let the dough ferment or proof too much time. Otherwise your bread might become flat when baked, as it won’t have the spring necessary to rise a last time in the oven. In short, as long as your dough is hungry it will continue to ferment and grow in flavor and size. When it stops feeding, it will become less active and more lethargic. There is, therefore, a limit on how long your dough can ferment or proof without needing to be fed more flour and water. Remember your dough is alive and will only stop its activity when baked in the oven.
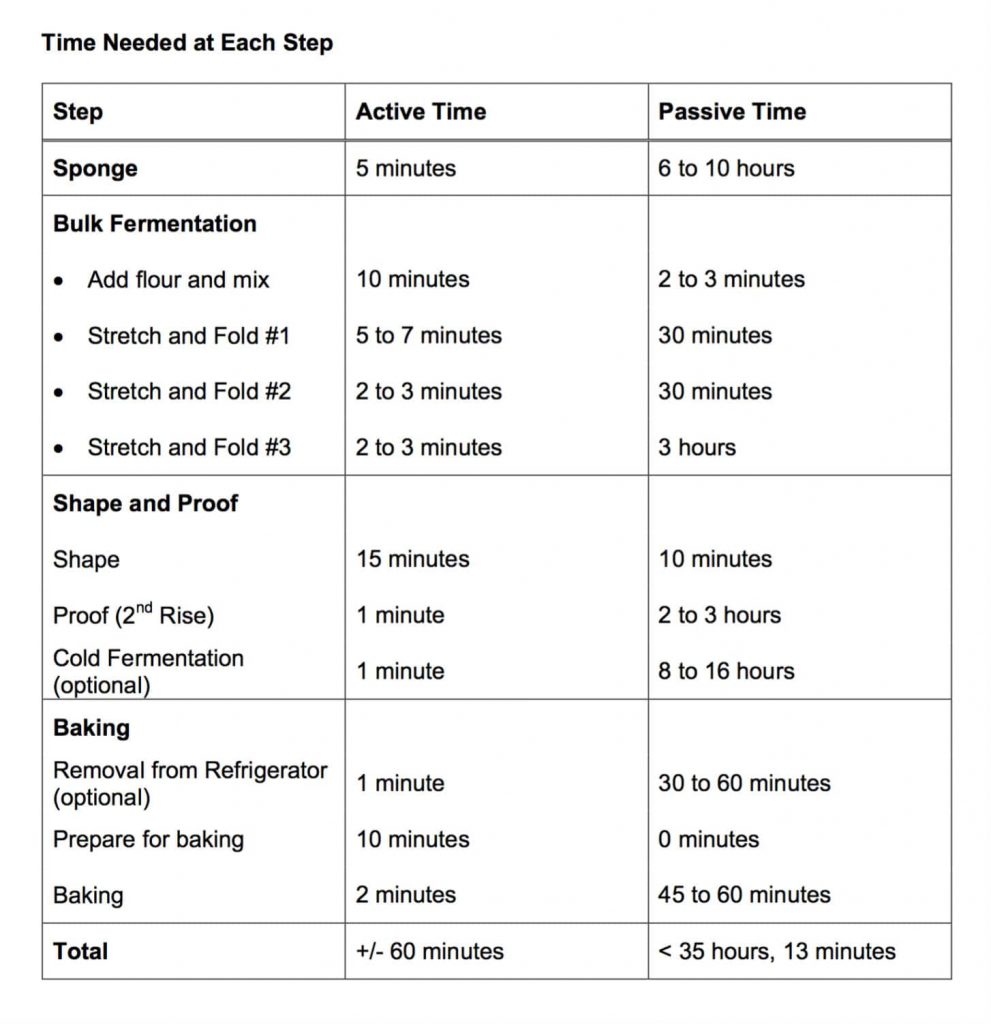
If you start making sourdough bread on a regular basis, you will not even think about the time it takes. For instance, you will create your sponge (the first mixing of the sourdough starter with water and flour) before going to bed. Then you will knead in more flour and salt in the morning before leaving the newly formed dough to rise for the bulk fermentation (first rise). Later in the afternoon or early evening you will shape and proof your bread (second rise) a couple hours before putting your dough in the refrigerator to ferment slowly overnight. The next morning you will bake your dough in the oven.
Below is a timetable for the entire sourdough bread-making process.
Enjoy the warmth and comforting smells while your bread bakes (between 45 and 60 minutes, depending on its size). Let it then cool for an hour before tasting it. Below you will see some ways I’ve enjoyed my sourdough bread.
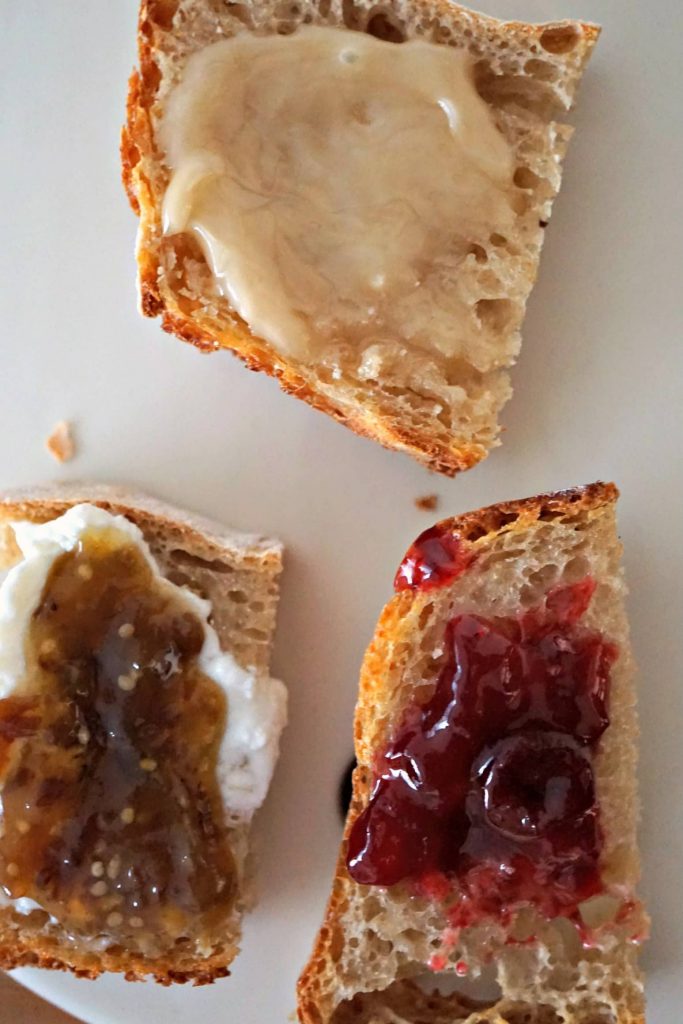
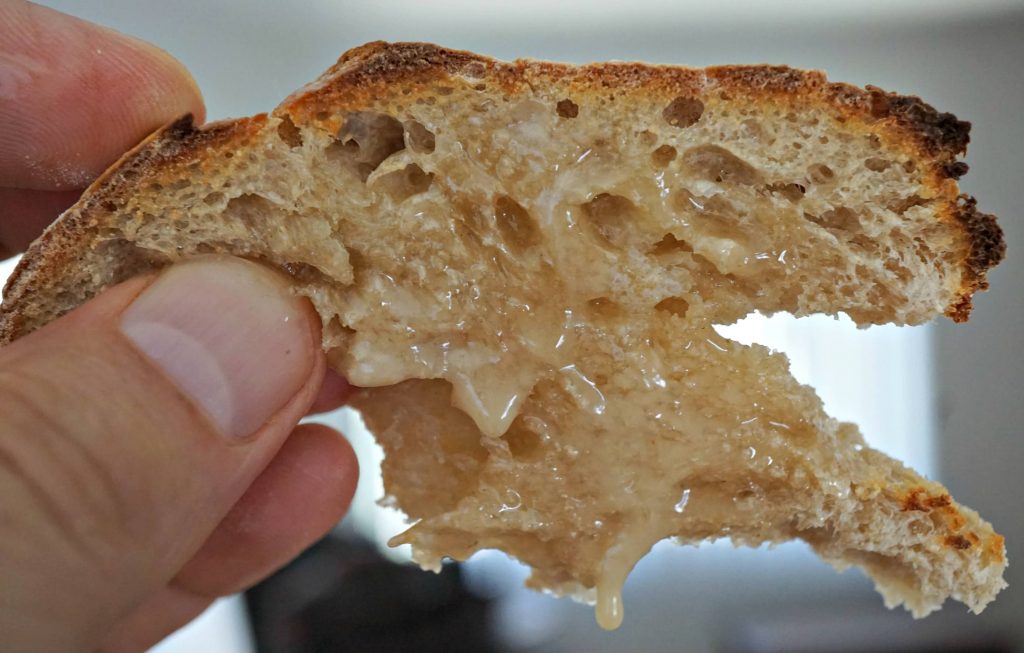
Once you try your sourdough bread, you will be hooked! You will immediately start planning your next loaf!
Trustworthy Sourdough Bread
Ingredients
Sponge
- 250 g sourdough starter
- 800 g water (spring or filtered preferably)
- 350 g unbleached wheat flour (bread flour)(see notes)
- 155 g high extraction wheat flour (brown flour)(see notes)
Bulk Fermentation
- 425 g unbleached wheat flour (bread flour)(see notes)
- 145 g high extraction wheat flour (brown flour)(see notes)
- 24 g salt
Instructions
Sponge
- Pour the sourdough starter into a large bowl. Add the water and then the amount of flour indicated for the sponge step. Mix together gently with a wooden spoon.
- Cover the bowl with a cheese cloth or a dish towel. Leave the covered bowl in a place sheltered from drafts for several hours. I usually prepare the sponge before going to sleep and leave it overnight. The temperature where the bowl sits should not be too hot or too cold.
- After the long rest, you will have a sponge (a frothy mix, with bubbles on top). The bubbles show the sourdough starter is active.
Bulk Fermentation
- Add the amount of flour and salt indicated for the bulk fermentation stage into the glass bowl with the sponge. Mix together with a wooden spoon. Let it sit a few minutes.
- Stretch and Fold: Starting on one side of the bowl, lift the dough up and fold it over the dough towards the other side of the bowl. Turn the bowl counter-clockwise one-forth and repeat the stretch and fold. Keep turning the bowl as you stretch and fold about 5 to 7 minutes. You will see that the dough becomes less sticky and holds together better.
- NOTE: Many recipes call for you to turn the dough out onto a floured board for the stretch and fold phase. I leave the dough in the bowl and use a dough scraper to lift the dough up and fold it over to the other side.
- Stretch and fold the dough 2 more times, with at least 30 minutes between intervals. You will see after the first interval that the dough has risen a bit. Be more gentle when you stretch and fold the dough the next two times for only a couple minutes.
- After the third interval, cover the bowl with a cheese cloth or dish towel. Let the dough rest in a place sheltered from drafts until it rises 1.5 to 2 times the size. It usually takes 2 to 3 hours beyond the stretch and folding intervals. However, the amount of time needed will depend on the temperature in the room (warmer temperatures will make it rise faster) and on how active your sourdough starter is.
Shaping and Proofing
- During this shaping and proofing phase, I take a few shortcuts that do not hurt the final result at all. Turn the dough out onto a floured board. Be careful that you do not use much flour at this stage. Divide the dough in half to make 2 loaves.
- With a dough scraper gently stretch and fold the dough one time around the clock, giving the dough the shape you like (round or loaf style).
- Lightly flour the banneton or the loaf pan that you will use for the second rise. Add a little cornmeal on the inside of your form to help avoid the dough sticking later. I usually use a banneton for one loaf and an enameled loaf pan for the other. Improvise according to the baking dishes you have available. Turn the dough over. Cup your hands around the dough and turn lightly
- Put some of the dough into each form. You can of course divide the dough into different proportions than half: half.
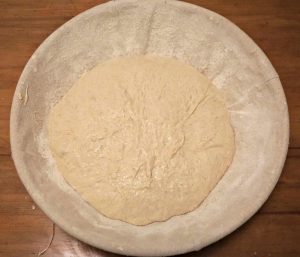
- Using the dough scraper again, gently bring the dough away from each side towards the other side. Basically you will stretch thin layers of dough from one side to the other, creating tension in the center. This helps form the final shape and prevents the shape changing much during baking.
- Cover the banneton and/or loaf pan with a cheese cloth or dish towel and let it sit about 2 hours for the second rising.
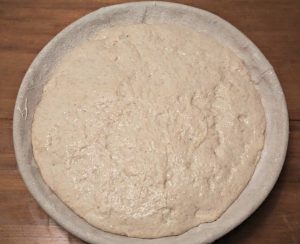
- Put the covered banneton / loaf pan into the refrigerator for a slow fermentation about 8 to 16 hours. I often put it in the refrigerator over night. The slow fermentation will help the sourdough to develop a deeper flavor. Try not to rush the process.
Baking
- Preheat the oven to 500°F / 260°C. If you are using a pizza stone or other pan for baking, place the stone or pan in the oven to preheat as well. It's important that you put the dough directly onto something that has the temperature of the oven.
- Take the dough out of the refrigerator. For my dough in the banneton, I turn it gently over onto baking paper. It might deflate a little, but do not worry it will rise again in the oven. For my dough in the loaf pan, I leave it in the pan for baking. If you use a ceramic or stoneware loaf pan, be sure to remove it from the oven 30 to 60 minutes before putting it in the oven to avoid breakage.
- Use a sharp knife or a lame to cut thin lines on the top of the dough. Try to make the cuts at a 45° angle. These cuts will help the steam to escape the dough when the bread rises in the oven.
- Spray some water into the oven immediately before placing the bread in the oven. The humidity will help the crust be less dry and more chewy.
- Place the bread in the middle of the oven. For my loaf on the baking paper, I use a pizza peel to gently place my dough onto a hot pizza stone. Turn down the oven to 450°F / 230°C. Keep the oven door closed at least during the first 15 minutes while the bread rises for the last time.
- Continue baking between 45 to 60 minutes, depending on the oven and dough. You can open the oven after the initial 15 minutes to spray more water on the walls of the oven (not on the bread). When the bread is ready, the top will be a golden brown and the edges will start moving away from the side of the baking pan (if you use one). If the bread is not in a pan, tap it on its bottom. If you hear a hollow sound, it is baked.
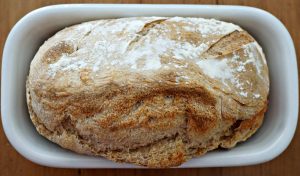
- Remove the bread from the oven and place it on a cooling rack for about an hour. If the bread does not easily fall out of the bread pan immediately out of the oven, wait about 10 to 15 minutes before gently removing the bread from the loaf pan using a sharp knife around the edges to prod the bread out of the pan. Leaving the bread in the pan too long may cause steam to make the bread a little wet on the sides and bottom. If this happens, place the bread back in the oven about 10 minutes to dry off.
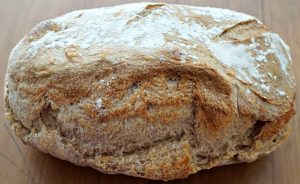
- Slice the bread and enjoy!
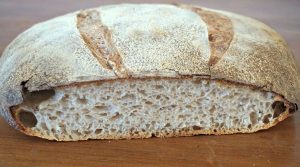

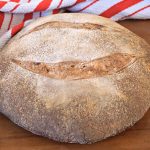
Thank you, Bradley, for gifting me the starter and teaching me how to bake the most wonderful, crunchy loaf of sourdough bread!
Your instructions are easy to follow – the only thing I’ll have to do the next time is to cut the recipe in half, as it’s only the three of us, girls:)
Hi Lana, thanks so much for your feedback. I’m glad you enjoyed the sourdough starter and were able to make a yummy bread! If you have too much bread, you can always freeze it, gift it away or slice and bake it again to make zwieback toasts.
My sponge was slow to start bubbling.. it took 20 hours. Now I can’t do anything with it til later tonight. What happens if the sponge continues to ferment for 36 hours? Can I still use it? Or should I put it in jar in the fridge now and start over when I have time.
Hello Maureen, in such a case when your dough does not rise because it seems to be inactive, I’d recommend taking your dough (the one that you tried to use from the starter) and feed it two or three times at 12 hour intervals. By feeding it equal weights of flour and water at such close intervals, your dough will become more active and can be used to make new bread. Let me know if you follow this advice and how it responds. Thank you!
Hi Brad. Is it possible to convert your bread recepi to cups instead of g ? I don’t have a scale and am a little lost. Also for the starter could you not crush the grapes and leave them for a few days, then just use the juice with the flour and water,as for keeping the starter on the counter all the time would you have to feed it every day?
Hello Mady, yes you can change the measuring method on the recipe itself. Below the list of ingredients in the recipe you can change the number of servings as well as switch between the Metric and Imperial measurement units. Just toggle to “Imperial” to read the recipe in ounces, etc. Yes, you could probably remove the grapes and leave the juice after a few days. The wild yeast is found mainly on the skin of the grapes, so it does help a bit to keep the skin in the starter as long as indicated for best results. If you leave the starter on your counter, you do not need to feed it every day if you do not count on making bread. If you plan on making bread, try to feed your starter at least once per day for 3 days leading up to making bread. This will help activate your starter enough to leaven the bread. You can find some answers to these questions, I hope, by reading this guide: https://belgianfoodie.com/basic-sourdough-starter-guide/. Feel free to send other questions. Please give feedback after you start using your sourdough starter and then make some bread. Thanks!
My bread is sour, aromatic with chewy crumb but hard, tough crust. Any idea why? I add water to a sizzling hot pan when putting the dough into the oven. Your thoughts?
Hi Vlad, your oven may be too hot that the outside is cooking faster than the inside. How hot is your oven? Have you had your oven calibrated to make sure the temperature is correct? Hope this helps.
Hi Bradley, your recipe is so helpful for those of us who have never made sourdough bread! I fear that I have done something wrong. I started with a lovely bubbly starter using your instructions.My dough is waaaay wetter than yours and hard to work with. It was lively but I couldn’t shape it because of how wet it was. I used a scale for all measurements. The only difference was that I used all purpose flour for the white flour. Could bread flour absorb so much more water.? I haven’t been able to find any where I live. I’ll give this another try after ordering some bread flour. Any other suggestions?
Hi, thanks for your questions and feedback. The amount of water needed may depend on type of flour used, as well as the temperature and humidity conditions in the place where you are making bread. Try adding less water or a bit more flour. Sometimes I need to use more flour to get the conditions I need to be able to handle the dough. It’s good practice to add most of the flour and then add a bit of flour at a time until you get the right measure. You might also need to try to allow the dough to autolyse more. This means, after adding the flour, let the dough sit for a half hour or more before handling or kneading the dough. The dough will absorb the water better and it will be easier to handle. Are you kneading the dough with your hands? If so, are you putting flour on your hands so it becomes less sticky? Some people add water to their hands, but in your case it sounds as if the dough is already too moist. You might also try using a dough scraper or a bench knife instead of your hands to move the dough in a kneading fashion. Please note as you knead more time, the dough will become less wet and will be easier to handle. This will also be true after it sits some time. Try again and let me know how you succeed. Making bread is not easy at first. It takes practice. Be patient the first few times you do it. Enjoy the journey.